|
Omnis News Tech Tips 2001 Below are past Omnis News Tech Tips from January 2001 to the present. Note: Clicking on the Omnis logo will open that dates news page in a new browser window.
Did you know: Omnis Studio 3.1 has added Solaris and Mac OS X to the platforms available to you for development and deployment. Omnis provides a number of features that allow you to detect the current platform of the client machine and execute the appropriate platform-specific functionality. The sys(6) function returns a letter code to indicate the platform of the current client. Here's a summary of all the possible values of sys(6):
The following example uses sys(6) to test the current OS and branches accordingly. If sys(6) = 'M'|sys(6) = 'X'
Did you know: you can refer to a list cell by referencing the listname, line number, and the column name, using the notation: listName.lineNumber.columnName If the list line is the current list line you can omit the line number. In addition, if you don't know the name of the column, you can use c1, c2, c3, etc. to refer to a column instead of using its name, for example: listName.[pLineNumber].c1 refers to the first column in the line which is in pLineNumber.
Did you know: you can develop code that can be used in a normal client server context as well as within a thin-client context. Often, you will find the need to use task variables, for example, you could have a row variable, USR, that stores the settings relevant to the logged on user. If you are using the new Studio DAMs, it might also make sense that each thin client instance have it's own session instance. This session instance could be fetched from a session pool using Remote Task - $construct When the web-user's remote task instance is closed, the session instance is returned to the session pool. The variable SESSION could be a task variable in the remote task and shared accross all remote forms associated with the task. It would make sense in the fat-client (client/server) context to also have a task variable called SESSION. We are now faced with the problem that we have a remote task with task variables and a normal task with task variables. Other classes can only use these task variables if they have the $designtaskname property pointing to the correct task class. Let us take the case of object classes: in remote forms, in order for the object to use task variables in the remote task, one has to set up the $designtaskname of the object classes to the remote task class. If the object class is to be used in a fat-client context, you will need to change the $designtaskname to the normal 'Startup_Task'. In order to make the transition between fat-client and thin-client as smooth as possible, it is advisable to have a super-object-class, for example, and set the $superclass property of all other object classes to this super-class. All objects ought to inherit the $designtaskname property from this super-class. If one wants to change the context of a thin-client to that of a fat-client app, all one needs to do is loop through all the super classes, be they object classes, window classes, menus etc. and reset the $designtaskname of the super-class from the 'rtRemoteTask' to 'Startup_Task'. The inheritance will pass on these changes to all the children. Note, if you use an object class in a remote form whose $designtaskname is set to the 'Startup_Task', the object class will not automatically gain access to the task variables of the 'rtRemote_Task'. When debugging code, this can really make your life as a programmer very difficult. The following code snippit would look for all classes whose name started with 'SUPER_' and would change the $designtaskname property of those classes according to the parameter pRemoteTask to the necessary class: Do $classes.$makelist($ref.$name) Returns ClassList This tip was supplied by Rudolf Bargholz of Online Travel Services
AG, Zurich.
Did you know: that if you supply an undefined list to the $fetch() method of a statement object, the list is automatically defined with the columns from your select statement? For example: Do ListVar.$define() The ListVar list variable is now filled with all the rows returned by the select statement and the columns are nicely defined as the columns of the table. Note that this is a normal list, not a list using a tableclass! So you don't have any $insert/$update/$delete but this is great when doing multi table adhoc queries for reports. This tech tip was supplied by Bastiaan Olij of FIQAS, who are leading Omnis developers at the forefront of billing and CRM solutions, particularly for the rapidly expanding 'usage-based' arena in communications, internet, CATV, and utilities markets.
Did you know: you can select the window background that is covered by a tab pane or page pane in a number of different ways. It isn't always possible to click on the window background to bring up the properties of the window. If you have such a set-up and quickly want to make changes to the window properties, you have two options here: 1) Open up the "Field List" by right-mouse-clicking anywhere on the window and selecting the window line, the root of the Field List tree, in the Field List window. The properties of the window will now be visible in the property manager. 2) The other, quicker option is to CTRL-click on the tab pane, page pane, etc. This will deselect the pane and the window will become selected. Note, this will not work for all objects: CTRL-clicking on a headed list, entry field or check box, for example, will not deselect the object and select the window. Another option here is to use SHIFT-click. This will toggle the selection of the object. If only one object in the window is selected, pressing SHIFT-click will toggle the selection from the object to the window and back again. This tip was provided by Rudolf Bargholz, Online Travel Services AG, Switzerland
Did you know when you change an object or several objects on an open window using the Do command, you often need to redraw the window. You can redraw an object, window, or all open windows using the $redraw() method (as well as the various 4GL Redraw commands). Note that if you change an object before $construct() completes execution for the window instance, you don't need to redraw the window. Here are some examples of using $redraw():
Did you know you can detect events when the user expands or collapses the nodes in a tree list. The following events are generated when a node is clicked on.
This weeks Tip is from Doug Kuyvenhoven of Vencor Software, author of StudioTIPS, the learning and reference tool for Omnis Studio. You can download StudioTIPS Lite for free. Doug's Tech Tip: A trick I like using for kEFposnClient fields is to assign the $edgefloat in the $construct of the object. That way the window object isn't "in your way" while you are designing the window and wanting to click on the containing window or window object. (This can get messy when you have a kEFposnClient object on a page pane object which is also set to kEFposnClient.) $construct ;; of the kEFposnClient object initially set to kEFnone
To make the containing object easier to "see", you can
set it to a different color from the kEFposnClient object. The containing
object will be covered up in the $construct anyway.
Did you know report classes have their own page setup details stored
as properties of the class: pagesetupdata stores the page setup
data for the class; orientation specifies the page orientation,
the default is kOrientDefault; paper is the paper size or type,
one of 50 or so constants, the default kPaDefault; paperlength is
the length of the paper in cms or inches, the default is zero; paperwidth
is the width of the paper in CMS or inches, the default is zero;
scale is the scaling factor in percent, the default is zero; copies
is the number of copies, the default is zero Did you know you can populate a list with a number of default lines of data, rather than building the list from your database every time the list is initiated. Most types of simple list fields (inc list box, combo, & dropdown) allow you to set up some default data in the defaultlines property; using the defaultlines of a list is convenient for short lists of data that doesn't change, such as a Salutation/Title field containing Mr., Mrs., Ms, etc. You can load the data for the selected line in a default list in the usual way via pRow parameter returned to the $event() method for the list field. Please e-mail us your Studio quick tips, and we'll acknowledge you here.
Did you know that when trying to debug notational commands that affect a row or list variable, by adding the name of the variable in the comment area, you will be able to interrogate the contents of the variable. Do iList1.$fetch() ;; iList1 By implementing the code above you will be able to interrogate
the contents of the variable when you cursor over the commented
variable name or right click on it.
Did you know Omnis Studio provides the means to manipulate files in many ways with the 4GL command set available via the FileOps External Component. More recently it is now possible to use the FileOps External Object for enhanced functionality and ease of use. The latter method is, in effect, replacing the old way of achieving this functionality in Studio 3.0.2 for Mac OS X. There is a technical note intended to outline the benefits of the External Object approach and ease the transition from the old 4GL commands to the new notation. The technical note describes the differences between the two approaches to FileOps in Studio and the required changes needed for the upgrade to Studio 3.0.2 and ultimately 3.1. FileOps Technote: TNNO0013
Did you know you can install the Omnis web client on the client's machine automatically, without the need for a link to a manual installer. Automatic installers are currently available for Windows 32 which initiate the download of the web client plug-in when a web page, containing a web client remote form, is visited. To take advantage of Automatic Installers, you should use the new html template file called "download.htm" that ships with Studio 3.0, located in the Studio/webclient folder. To use the html template for local testing, simply rename the current template file to template.old and rename "download.htm" to "template.htm". Having done this, any html generated as the result of local testing will be enabled for Automatic Installation. If you have existing html that you wish to update, you will need to copy the Netscape JavaScript function downloadNow() from the "download.htm" template and place it at an appropriate point in your html page. If your page supports ActiveX controls, you will also need to modify your ActiveX plugin declarations to specify a codebase. An example of this can be found in the "download.htm" template. By default, the "download.htm" template uses default URLs to point to Automatic installers which reside on the Omnis Server. If you wish to store these on your own server, you should copy the appropriate files from the installation CD and update "download.htm" to point to your preferred URLs. See the download.htm and the Readme.txt files in the Omnis/Html
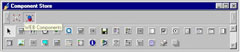
folder for further information. Did you know you can add classes containing your own components
based on the standard Omnis field types. These classes in the Component
Library can be called what you like, but a class containing fields
or other window components must start with an underscore. You can
also assign names and icons to your own classes in the Component
Library, to be used in the Component Store. In addition when you
create objects from your own classes in the Component Store they
will contain your own methods. To add a class to the Component Library: select Class>New>[class] from the Browser menu bar; Name the class and double-click on it to modify it; Edit the properties of the class, including its component icon property; Save the class and close it. When you close the Component Library the class you created will appear under the appropriate group of classes in the Component Store toolbar. Modifying the Component Store is documented in chapter 12 of the Using Omnis Studio manual.
Did you know you can change the look of the method editor via the options in its View menu; note some of the options have shortcut keys for Windows and Mac.
Did you know Omnis has 13 different data types, and some of these such as Number and Date have many subtypes. The following list contains a summary of the different types:
This week's tip is from the Using Omnis Studio manual.
Did you know the Slider component provides a graphical thumb component
that the user can drag to control the numeric setting of another
component in your form, e.g. a volume control, progress bar, or
a setting of some kind. The current value of the slider is specified
in the property $val; at design time you can enter a default value,
and at runtime $val holds the current value according to where the
slider is positioned. You can specify the range for the slider in
the $min and $max properties. Most of the other properties are self-explanatory
and handle the appearance of the slider component. The Slider reports
3 events: evNewValue, evStartSlider, and evEndSlider which you can
detect in the $event() method for the component. These events all
pass the current value of the Slider in the pNewVal parameter. As
the user drags the Slider thumb the evNewValue event is triggered
and pNewVal is sent to the $event() for the Slider. Take a look at the downloadable example Studio library and try it out. The sample library is Studio 3.0 and uses client side scripting.
Did you know writing simple row and column reports seems a never ending task as different users need different versions of substantially the same data although the searches may change. Omnis supports copying and pasting from a screen report with tabs between the columns. And screen reports permit column heading in ways export reports do not. Consider developing a comprehensive field list from your most popular files (purchasers, invoices, stock) then let users print to the screen and copy and paste to a spreadsheet. Even novice users quickly learn how to select the columns they want in the marquee or delete redundant columns from within their spreadsheet. They can sort on any column, add transitory data in their own columns and e-mail it to others when they are finished, an advantage over the traditional paper report. This week's tip is from Richard Ure.
Did you know you can highlight fields and create Pop-up help tips in your remote forms. This Studio tech tip and downloadable sample library was sent to us by Daniel Bogesdorfer. Let Daniel explain this very neat technique. I've been creating an Online Curriculum Vita search engine for the University Of Pittsburgh. This allows university researchers to find critical information when needed about fellow members. To allow a more friendly experience for the end user, I use background images and highlight entry fields when users enter the respective fields in the remote form. This is done by creating a balloon-type help image and placing it adjacent to a data entry field like a date field or social security field. When the user enters the field the On evBefore event is fired and the entry field has a background color of light yellow and the image is visible. When leaving the field it returns to its previous state. The following code in the $event() method can be executed on the client using Studio's new execute on client feature. On evBefore
Did you know there is a new feature included with Omnis Studio 3.0 that allows you to detect Enter and Esc key events for OK and Cancel on remote forms. There are now two new properties for remote forms, $okkeyobject and $cancelkeyobject. These properties are assigned the values of button objects on the form that will then invoke respective their $event (On evClick) methods when Enter or Esc are pressed by the user.
Did you know the Server Configuration dialog lets you enter the server port and server maximum concurrent requests preferences; the latter is specified by the serial number of your Omnis Server, but if required you can further limit the number of connections by decreasing this number. The Server stacks ($serverstacks) parameter lets you specify the number of method stacks (and therefore threads) on the Omnis Server, which will be created when you execute the Start server command. The Timeslice ($timeslice) parameter lets you specify the duration
(in 1/60th second units) of the execution time slice for a server
thread.
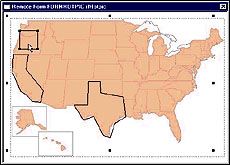
Did you know the new HotPic web component lets you create 'hot'
areas in a remote form usually over a photograph, map, or an illustration.
For example, you could have a map of the US with the various states
defined as different hot areas; here is the remote form in design
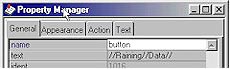
mode: Did you know the text for a pushbutton is entered in the $text
property. The default value is "Pushbutton" but you can
change this in the Property Manager. Under Windows you can use the
"&" character before a letter to enable the Alt+letter
key to activate the button from the keyboard.
Did you know the Omnis Component Store contains over 30 different
web components that let you create very interactive, feature-rich
environments for your web applications. The remote form wizards
add components to your forms automatically, but if you are creating
your own forms or adding fields to an existing form, you use the
Omnis Component Store. When you have created a component in your
remote form, you can modify it by changing its properties in the
Property Manager.
To create a web component from the Component Store: open your remote
form in design mode, press F3/Cmnd-3 to open the Component Store,
click on the WEB Components button, and then drag the component
onto your form. You can easily change the properties of a component
in the Property Manager.
Did you know you can add tool-tips to each control in an Omnis
toolbar. Each toolbar control has the tooltip property in which
you can enter a short description for the tool; when the user moves
their mouse over the tool the descriptive message pops up. Remember,
to show toolbar tips in Omnis you have to set the preference showtoolbartips,
available under the Tools>>Options/Preferences menu option.
|
||||||||||||